Using a fastening device to make jewelry may seem like a preposterous idea, but well, safety pin jewelry has been made and it has become quite a rage. Presenting to you how you can make your own line of very popular and in-demand jewelry from safety pins.
When Walter Hunt, the American inventor used the idea of fibulae, a clasp-like device used by the Mycenaeans, to reinvent the safety pin, little did he know, that this tiny little fastening device that he patented was going to be put to so many varied uses. And even if he did, I am sure that of all the things that he came up with, making jewelry was definitely not on the top of the list.
Little did he know that with the emergence of the punk sub culture, safety pins would be inculcated into the list of fashion accessories and that these devices would achieve a cult status in their own right. This type of jewelry is especially popular due to the ease with which they can be made and the many different personalized designs that you can create with them.
The Guide to Make this Jewelry Type
While making this jewelry is simple, you need to be careful about ensuring that you file the sharp tips in order to prevent any kind of injury to yourself. Once you have taken the necessary precautions, try out all the crazy ideas you can think of, using the basic instructions given here.
Earrings
Things You Need
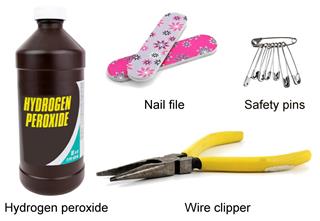
- Safety pins
- Wire clippers
- Nail file
- Hydrogen peroxide
Instructions
- Take the safety pins and clip off the tips to ensure that the sharp edges do not hurt you when you try to wear them.
- Now using the nail file, file off the edges so that there are no sharp edges. After you are done with this, you can use your imagination and creativity to come up with different designs for your earrings. You can thread beads into the safety pin or attach it to a earring hook and rivet chains.
- Clean the ear accessories with hydrogen peroxide to make sure that they are completely safe to wear.
Bracelets
Things You Need
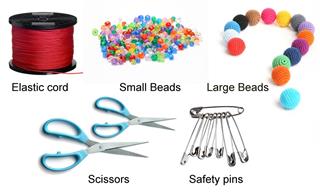
- Small safety pins, 50
- Beads, small, 1 packet
- Beads, large, 1 packet
- Elastic cord
- Pair of scissors
Instructions
- Thread the small beads into each of the safety pins. Ensure that you leave enough space in order to fasten the safety pin.
- Take the elastic cord and cut two pieces measuring 12 inches each.
- Now take one piece of the cord, thread it through the upper hole of the safety pin, now thread in a larger bead and then thread in another safety pin through the bottom hole of the pin. Repeat the process for all the safety pins or till it is long enough to sit tightly around your wrist.
- Now take the other piece of elastic cord that you had cut and thread it through the bottom half of the wrist. Once you are done, tie the ends of the bracelet together and flaunt your handcrafted jewelry.
Necklace
Things You Need
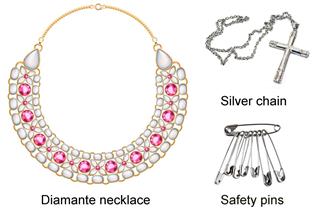
- Safety pins, two packs
- Silver chains, 3
- Diamante necklace, 1
Instructions
- On a flat surface, spread out the diamante chain. Now take one of the silver chains and hook it with the necklace. Now start looping the chain by threading it in between the various embellishments till it reaches the other end. Repeat this process with the other two chains. This process ensures that the chain looks bulky and is a stylistic piece fit for the punk look. Also it tones down the shine in the chain and gives loops for the safety pins.
- Once you are satisfied with the appearance of the new look diamante necklace, start randomly pinning the safety pins to the chain in order to create the desired rocker look. This is just one of the many patterns that you can try out for necklaces.
Using the instructions given above, you can also make brooches and headdress pins. Just give a free rein to your creativity and you can surely come up with many new and innovative ways to use these commonplace fasteners for another, totally ornamental purpose.


