Sandblasters are used to shape and clean a hard surface. In the fashion world, it has also seen an increasing usage, in giving jeans an acid or distressed look. Here is a step-by-step process of how to build a sandblaster, in the comfort of your own home.
Sandblaster is an equipment used for smoothing, cleaning and shaping hard surfaces. Sandblasting is done by forcing the solid particles through an accelerated nozzle across the surface at high speed. It has variety of uses, from removing the corrosion and rust, to cleaning plastic and steel. It helps in surface preparation before painting or bonding, provides matte cosmetic finish on products, and removes mold flash from plastic components.
A sandblaster is also used a lot in glass work, to provide accent to stained or fused glass. Previously sand was the only material used for abrasive blasting. However, with increased risk of lung disease like silicosis that is caused by extended inhalation of the sand dust, other materials like steel shot, steel grit, crushed glass, copper slag even walnut shells are now used as alternatives.
There are a number of professional equipment used for sand blasting. From dedicated automatic models with robotic controls to simple hand cabinets, there are diverse types of sandblasters available in the market. However, the expense associated with acquiring one of these can be significant. A cheaper alternative is to make a sandblaster at home. Although the process is not easy, it can save you quite a few bucks. Here is a guide on how to build a sandblaster.
Building a Siphon Sandblaster

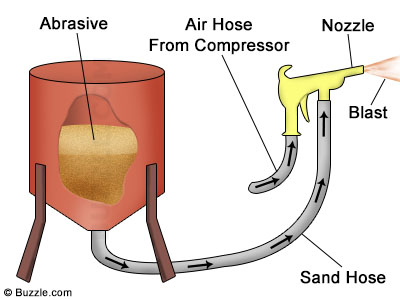
There are essentially two types of sandblasters, siphon and pressure sandblaster. While both the types of sandblasters use pressurized air from the compressor to function, the difference lies in the way the abrasive is fed into the nozzle before being pressurized out. In a siphon sandblaster, an open, non-pressurized hopper is used with two hoses connected out, one for supplying air, the other shoots out the abrasive material.
Things Needed
» One Non-Pressurized Hopper
» Siphon Blaster Handle/Nozzle
» One-way Control Valve
» Two ½” Rubber Hoses, one media hose and an air hose
» 5HP Compressor
» Drill (hand or power)
» Welding machine
How to Build a Siphon Sandblaster
Step 1 : Drill a 1″ hole in the bottom of the hopper. Weld a control valve at the end.
Step 2 : Connect the media hose to the one end of the control valve, and attach the other hose to the siphon blaster nozzle.
Step 3 : When the trigger of the siphon blaster is pressed, the nozzle is activated, and the high pressure and volume passing through the venturi of the handle, leads to the suction of media and air through the hoses. As compressed air is jetted out of the gun, it draws the sand through the hose, embedded in the sand pile at the bottom of the hopper, to be jetted out along with the compressed air. This creates a sandblasting force, which works on the item it is used on.
Things to Note
Although siphon sandblasters are cheap and easy-to-make, there are some key disadvantages associated with it. The siphon blaster nozzles are bigger than pressure blaster nozzles thus consuming more pressure, and larger compressors for operation. There is a large volume of air that is required for sucking the abrasive material from the hopper, making it slower than a regular pressure sandblaster. Moreover, these blasters tend to get clogged easily with the media, leading to cleaning difficulties.
Building a Pressure Sandblaster

Unlike siphon sandblasters, pressure sandblasters, blast four times faster, and are thus more effective for large productions.
Things Needed
One Empty Propane Tank
1″ Pressure Regulator
⅜”, 5-feet Rubber Hose
Three 1″ Male Threaded Pipes
1″ T-connector
» 1″ Female 4-way Cross Pipe Fitting
» One 1″ Pressure Gauge
» One 1″ Male threaded Elbow Fitting
» One 1″ Female Threaded Elbow Fitting
» One 1″ water Separator
» One Tube Fitting (bulkhead union)
» One Mixing Valve
» 2 Safety Pressure Release Valve
» ‘Dead man’ Control Nozzle
» Compressor (based on size of nozzle)
» Drill (hand or power)
» Power Hacksaw
» Welding machine
How to Build a Pressure Sandblaster
Step 1 : To make a pressure sandblaster, remove the nozzle of an old propane tank. Make sure there are no remaining vapors in the tank which can be harmful. Create a filling top, by drilling out a hole in the top, and attach a lift-up top.
Step 2 : Drill out a 1″ hole in the bottom of the tank and another 1″ hole on the top side of the tank. Use a power hacksaw to cut 3″ (including the threaded end) of a 1″ male threaded steel pipe. Do the same for another pipe to get two 3″ threaded steel pipes. Weld the pipes to bottom and sides of the tank.
Step 3 : Screw on the mixing valve onto the end of the bottom pipe. Screw a 1″ equal T-connector from the bottom of the mixing valve.
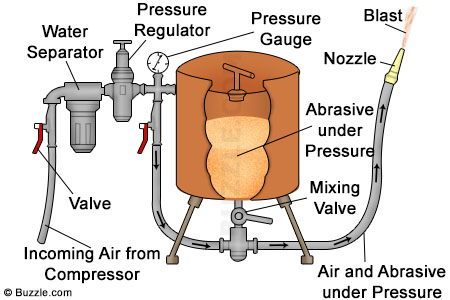
Step 4 : Attach a 1″ female 4-way cross pipe fitting to the threaded steel pipe on the top side of the tank. Screw on the pressure gauge on top, the pressure regulator on the side and a safety valve on the bottom. Attach the water separator to the pressure regulator.
Step 5 : Screw on a male threaded elbow fitting from the water separator, and a safety valve for regulating the incoming air from the compressor to the other end. Attach the pipe from the air compressor to the safety valve.
Step 6 : Screw on a 1″ male threaded pipe from the bottom of the safety valve that is attached to the 4-way fitting. Cut it off right at the base off the propane tank, and screw on a female elbow fitting at the end. Measure and cut a small section of pipe, and attach it to the T-connector. Weld the joints.l
Step 7 : Attach the rubber hose to the other end of the T-connector at the bottom, and fix the nozzle on top using a tube fitting. The pressure in the tank allows the abrasive media to mix with the air. The media is now forced into the mixing chamber. The air from the compressor that enters the mixing chamber is regulated and lowered before entering the nozzle. By adjusting the mixing valve, the amount of abrasive can also be adjusted.
Using Sandblasters
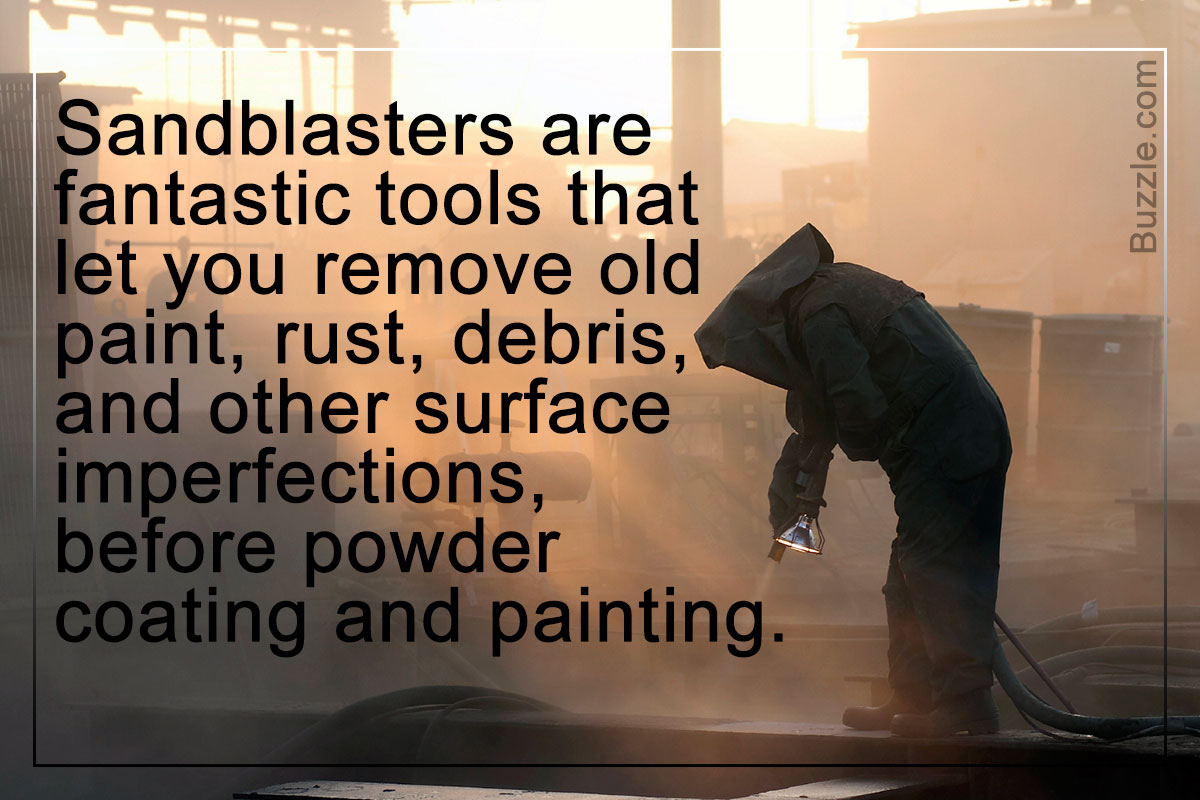
Sandblasters are fantastic tools that lets you remove old paint, rust, debris and other surface imperfections before powder coating and painting. To use the sandblaster properly and get the finish you want, here are some tips on how to use it correctly.
Step #1: All the valves of the sandblaster need to be closed including the lower mixing valve.
Step #2: Fill the tank with chosen media.
Step #3: Put on protective clothing including respirator, abrasive-blasting hoods, welding gloves and long shirts to avoid any mishaps.
Step #4: Get rid of the moisture in the machine dryers and attach the air supplies. Turn the pressure up and regulate it.
Step #5: Open the nozzle valve, and close the mixing valve. Now open the main air valve that regulates the air flow to the tank, and allow the pressure to build up inside the tank.
Step #6: Open the mixing valve halfway once the tank pressure has been built up and close the other valves. Point the nozzle in the proper direction, and open the mixing valve slowly to sandblast a required area. Remember to work up the volume slowly, for a more even flow. A few minutes of experimentation will help you determine the appropriate pressure.
Safety Instructions
Safety is of primary importance when building and using sandblasters.
» Machines and hoses should be checked from time to time to check for any wear and tear or clogging.
» The blasting can lead to the grit rebounding from the surface which is why safety equipment is of prime importance. Respirator hoods, protective clothing like aprons and dust collars and dust filter respirators should be used.
» Do not use silica sand which tends to break down into fine particles and enters the lungs, thus causing silicosis. Metallic media like steel shot, steel grit, copper shot and zinc shot are used as alternatives. Some people also prefer to use crushed nut shells and kernels.
» Sandblasting is often a messy job and the rebounded grit can settle, and even damage surrounding objects. Make sure that sandblasting is done in an isolated, well-ventilated spot, and all things nearby are properly covered.
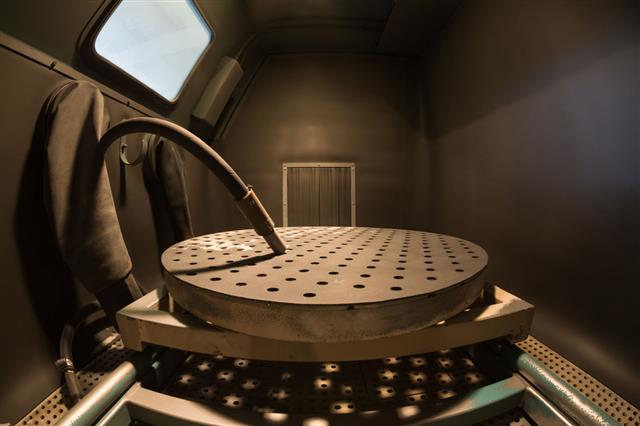
Apart from the portable sandblasters, there are also sand cabinets in which small objects can be blasted. Creating a do-it-yourself sandblaster and using it is fairly simple, once you know how to do it. It is important to however take care of the safety instructions to avoid any mishaps. In case of doubts when building a sandblaster, it is best to seek professional advice.


